Tuesday, November 30, 2010

Crafty Recycling - Gift Bag Makeover

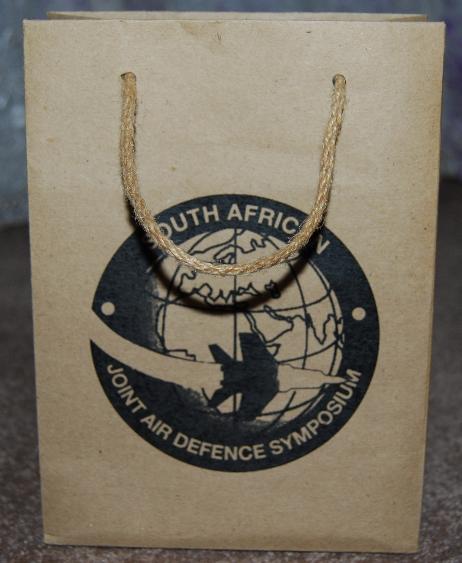
Yesterday was my step-mum-in-law's b'day, so I had to whip up a quick little gift. :)  With my crafty schedule a little full at the moment, I had no time to make something myself, so I bought 2 little gifts.  However, since I just have to put my personal touch in somewhere, I decided to make her a little gift bag.  I did this by using a gift bag that I've had for a few years, but couldn't really use because it had some symposium logo printed on it:
Then I remembered that I'd collected some pretty pictures from a magazine years ago and file it away....so I thought I'd use some of that paper to cover up this logo.  I cut out a circle with my cool circle cutter goodie:
And decoupaged it onto the baggie:
Then I thought it looked a bit bland, so I went rummaging through my ribbon stash to see if I could find something that I could stick around the picture...and I found a roll of red streamer that I've had for YEARS!  I thought this stuff is flexible enough to work with, so I came up with this "design":
And it worked pretty good! :)  I glued it down with ordinary glue, using this awesome glue pen!:
This pen is so much fun to work with, it makes life so much easier!! :D
So then after finishing the design, I just glued down the little ruffles to make it look a little neater:
And added some bling where the join was to cover that up:
 And then I thought it'd be cute to add her name somewhere on the packaging, so I used one of these extremely cute little wooden slices:
And burned her name into it using my husband's soldering iron.  It didn't come out as neat as I wanted it to, because I couldn't hold the iron anywhere near the tip as I was writing (I really need to get me a proper wood burning goodie).  And then I used my cute and new little Dremel tool to drill a hole for the string!  (ok, so my husband drilled it this time, but anyway).  And, because I'd been wanting to use glitter for this gift bag since the beginning but didn't know where to add it, I added it to the name tag:
It looks a bit Christmas-y, I know, but nevermind, it's cute. :D
I tied this to the baggie with some red string:
I only noticed afterwards that the round glitter ring on the name tag matches the round ring around the picture on the bag. :D
I'm going to give it to her tonight!

LINKY PARTIES linked to:
Sugar Bee - Craft Edition
This & That
Free Pretty Things For You
The Trendy Treehouse
Someday Crafts
Seven Thirty Three
Finding Fabulous
Fireflies And Jellybeans

POSTED on:
Going Green Crafters & Artists

My New Home Executive Assistant!

I have a new assistant at home, which means I'll have a few more minutes a day to spend crafting! Hehe....
My dishwasher!
Anyway, this is all.  It was just exciting news. :)

Sunday, November 28, 2010

Wedding Album Project - Part 2

Finally I've gotten to page 2 of my album! :)
Part 1 featured the wedding invite, and Part 2 here features the chapel:
Along the bottom of the page I stuck of the butterflies that my sister sprinkled on the chapel floor as she walked down the isle.  Oh, and the heart shape on the bottom right is the bottles of bubbles.
I have too many photos, and so all the pages are probably going to be this full, but I can't help it!  I think it looks OK though, and this one doesn't look too crowded if you ask me.
Anyway, I thought since this page is about the chapel, I'd make the chapel photo the focus point (not that I think anyone can really tell that there's a focus point on this page, haha).  I did that by using beautiful little photo corner stickers:
 
I also featured one of the butterflies that was used on the chapel decoration - the tree that my mum and future brother-in-law made out of styrofoam (you can see more pics of the tree in this post).  I added some blue glitter glue all around it:
I love using rhinestones in scrapbooking because of the sparkle they give, so I added a few around the page.

I recreated the sweetie bags (which can be seen in this post) that I gave to everybody as they entered the chapel - I photocopied some of the heart shaped wedding themed sweets, cut them out and put them in the bag:
Then I printed our wedding vows, folded it up and put it into a cute little envelope.  I scraped the edges of the envelope on an inkpad to make it look more interesting: (isn't there a specific name for this scraping process...?  I guess I've just given away my amateur scrapbooker status, huh? Hehe.)
Finally I thought of something interesting to do!  The background page had a pretty twirly pattern on it, so I took gold glitter glue and traced over some of the twirls on selected parts of the page:
It didn't come out as neat as I'd hoped it would, but I think the idea is cool!  If you click on the first photo of this post to enlarge the photo, you'll be able to see a little more of where I added this gold glitter glue on the page.
And.....that's page 2 of my 20 page album! :D

LINKY PARTIES linked to:
Scrappy Gifts

My page was featured on Scrappy Gifts! :D

BWS tips button

Saturday, November 27, 2010

Mini Clothing Peg Magnetic Memo Holder Tutorial

I'm going to show you how to make these cute little magnetic memo holders, which were fun to make. :D
Here are the supplies you'll need:
Mini clothing peg
Scrap material
Modge Podge and brush
Craft glue
Scissors
Little decoration for peg
Sheet magnet (or your magnet of choice)

Cut a piece of material slightly bigger than necessary to cover the peg - you'll trim off the excess later:
Brush on some modge podge to one side of the peg:
Stick on the material:
Let it dry for a minute or so, then trim off the excess material with your scissors.  Apply another layer of modge podge over the material:
Let it dry completely for about 5 - 10 minutes, and then apply your little decoration with craft glue:
Let that dry properly, and then cut out a piece of sheet magnet the same size or slightly smaller than the side of the peg (it mustn't stick out over the sides), peel off the protective layer and stick it on the peg:
Finally, go find a note that you need to display on your fridge, and use your cute little peg to hold it in place! :D

LINKY PARTIES linked to:
A Little Lovely Blog
Chic On A Shoestring Decorating 
Mad In Crafts                                                        Hope Studios

Friday, November 26, 2010

Christmas Gifts 2010 - Part 3 (Mini Clothing Peg Memo Holders)

This was inspired by something made by Keren over at Free Pretty Things For You.  So of course I had to make my own mini version of those pretty little things. :D  I'm putting them in a Christmas cracker that I'm making for everyone this year (well, only the ladies are getting these in their crackers):
Click on the photo to see it enlarged.
 
Here's one I decorated with a teeny tiny little bow.  I just tied a single knot with the ribbon to make this bow:
A cute froggy thing, hehe.  I couldn't wait to find something to stick these little eyeballs on to. :D  This one's for my sis:
Some other cute ones:

I have some sheet magnet that I used to stick on on the other side, and there you have it, mini fridge memo holders!  Is this cute or what?! :D

And you can use them as......
Cracker fillings
Gift tag holders
Fridge magnet shopping list holders
For the tutorial on how to make these, click HERE!


LINKY PARTIES linked to
Making The World Cuter
C.R.A.F.T.
Sumo's Sweet Stuff
Luv, Laughter & Happily Ever After

CHALLENGES ENTERED into
Iron Crafter Challenge at Fireflies And Jellybeans

My little clothing pegs were featured on Free Pretty Things For You! :D

*Who made What? Weekends* Linky Party Starts Today!

Come and link up your recycled crafty creations HERE!
It will run from Friday until Sunday night, South African time.
Please join in, I look forward to seeing what you have!! :D

Random Crafty Talk - Tidying Up Craft Room

Show me a craft room that stays tidy all the time and I'll prove to you that I was Cleopatra in my past life. :)
Anyway, it was time to do something about my craft room - I ran out of storage space (and my organizing was a tad non-existant), so you can image what a mess it became:
I'm sure the fact that my craft room doubles as the ironing room and my husband's gym has something to do with my limited space and hence this mess:
My tables became my storage areas:
 
I even started storing stuff under my tables:
And so I had to work on the floor:
Actually I like working on the floor, but that's besides the point!
So I saw those storage drawers (you can see 'em in the first pic above) on special the other day and bought them!  And you can't believe what a difference that little extra storage space has made!
 
Now I can go back to using my tables for actual crafting and scrapbooking. :D
Just goes to show that a little storage space goes a long way!

SUBMITTED to:
Pocket Full Of Posies

Thursday, November 25, 2010

Crafty Recycling - Decoupaged Tissue Box

So I started decoupaging for the first time a few days ago, and my test subject was this tissue box:
When I started out, it didn't look too promising:
But I think it turned out not too bad, hehe.  I took some left over curtain scraps that I kept from our TV room curtains, cut them up into little squares, and decoupaged them all over this box.  The material is not smooth and flat, but has some texture to it, so it shows on the finished tissue box.  Also keep in mind that the box is thin cardboard, and so it warbled a little from the wet decoupaging!  But anyway....here is the final product:

I also decoupaged some pictures onto it - these are little pictures that I got from a friend in primary school....probably about 20 years ago! :0  As usual, I just couldn't throw them away, even though I didn't know what to do with them.  So I finally used them now.  I also added a ribbon and some "bling", as well as glitter glue to the pictures (which isn't so visible on the photos, boo).

This is by no means the greatest craft, but I kind of like it, it's cute, and it's my first decoupaged goodie! :D
And the perfect place to store all my confetti's that I had laying around in different boxes in my craft room.
How's that for cheap storage, and a way to use up scraps of material and decorations!

LINKY PARTIES linked to:
It's A Hodgepodge Life
Craft-O-Maniac
Texas Monkey
Keeping It Simple