Monday, May 30, 2011

Very Blue B'day Card


I made this card for The Sweet Stop's sketch challenge:
I Cuttlebugged blue card stock and glued it onto the white card base, and decorated some more white card stock with which to embellish the card further.  The white card stock at the back was dabbed over with an ink pad to give it some colour, and the b'day piece was cut out with fancy scissors and the edges inked as well, and mounted on 3D dots.

I added some ribbons at the back to follow the sketch design, and added a lot of blings & flowers....and a butterfly.
And ta-da!  A very blue b'day card is born. :)


SUBMITTED to:
The Sweet Spot Challenge 110   .

Sunday, May 29, 2011

Halloween Invites

We got started early with these invites 'cause we're hoping to inform the few people we're inviting early enough so that they can be available in October. :D
I basically just googled some images, cut them out and glued them together to make this card. I started with black card stock, cut out a skeleton menu frame to glue on, but then it was white in the centre, so I cut out a piece of ordinary black paper and glued it over the white centre of the invite.  Then I searched for cute halloween images to add.  I mounted the ghost with 3D foam dots, and glittered the bat to make the whole thing a little less dull.

The invite details are on the back:
I added some googly eyes that are supposed to look like they're staring at you out of the dark...but....ya, it didn't turn out as spooky as I'd imagined, lol.

Since halloween costume parties are not as big a thing over here as they are in US, I wanted to make sure the guests KNEW that it was a costume party (even though it does mention so quickly in the invite wording, but you never know what some people miss or look over), so I made an extra little tag to add in the envelope with the invite:
Hehe....

And then for the envelopes:
 
I printed out their names in a "scary" type font and cut it out with fancy scissors.  Then I added a piece of torn black paper to the corner...I was going to glue on a pair of googly eyes again to make it look spooky, but it ended up looking more like a black triangle version of Spongebob Squarepants or something, so I just omitted the eyes.

And to make sure that the tag didn't end up being overlooked in the bottom of the envelope, I just sealed the envelope with some of the tag ribbon sticking out...so that it can't be missed.


LINKY PARTIES linked to:
I Heart Nap Time                .

Tuesday, May 17, 2011

Purple Garden Themed Card

I've finally decided to make another card again...mostly because of my new CUTTLEBUG!, which I got in the mail yesterday! :D  I had to try it out.  So I made a card for Cupcake Craft Challenges' "in the garden" theme.
For those who don't know what a Cuttlebug is...(my mum may be wondering, hehe), well, it's the thing that made those little flowers on the purple paper there in the background. :D  Ok, so I only have 2 embossing folders so far and hope to get some more next month.  This goodie is gonna make card making so much more fun! :D (& pretty) :)
I used white card stock and smudged some purple pencil shavings on it, and on the small piece behing the flower, and inked the edges with an ink pad.  And added some blings.  I also cut out all the squares, including the card itself, with my Fiskars cutting goodie and it's square stencils.
 
:D


ENTERED into:
Cupcake Craft Challenges  .

Saturday, May 14, 2011

First Wedding Anniversary Gift - Framed Love Poem

On 30 May is our first wedding anniversary! :D

Well I decided to make something for the occasion.  You know how there's this thing where you're supposed to (for fun of course) give certain specific items for every year of the anniversary?  If you don't, you can see it here: Anniversary Gifts by Year.  For first year anniversaries you're supposed to write a love poem to your partner on scented paper....and since neither of us are into poetry and such, I decided to make something from both of us to both of us. :)  I printed out the words (on scented paper!) to the song which we played when I was walking down the isle at our wedding - Annie's Song by John Denver.  It's not so much a love poem, but I like the song and the words were suitable for this project.  So! Here it is....
I took an old frame laying around here (it started out like this one) and painted it dark brown and spray painted varnish over it.  My mum bought me these pretty scented papers for Xmas, and I only planned to use them for special things (that I don't have to give away, hehe), so I used the first one here.  Can you see the roses?

To decorate it further, I used some swirly chipboard cut-outs which I padded with a purple ink pad to colour it in and spray painted varnish over it too to make it look not so dull - and added some blings on too:
And I used a heart chip board goodie, but I only inked the edges this time - I think it looks nice - and glued on a rose.
I also glued on a mini mirror heart (I used these to decorate some things for the wedding too), and added our initials with stickers:
And that's it! I'm really happy with how it turned out. :)  I've put it on the little table in our entrance "hall", next to a wedding photo that I framed HERE too.  :D
 
And then, I had my family over for my b'day last weekend and I made Coconut Snowballs which I topped off with cream cheese icing:
Now get ready for the recipe, because it's quite complicated...

You ready...?

Here's what you'll need to do:

Mix together 1 can of condensedmilk & 750ml desiccated coconut, roll into balls and through some more coconut & chill in fridge.  Whew!

And then I got me one of those huge cupcake mould thingies - and made a huge-@$$ cupcake:
Hehe...anyway, had me some fun with that.  I rolled one of the snowballs in red coconut and used it as a "cherry" to top of the cupcake cake. :)

LINKY PARTIES linked to:
Making the World Cuter    Craft-O-Maniac
The DIY Showoff             All Thingz Related

Friday, May 13, 2011

Who Made What? Weekends! #21!

Well, it's SORTA party #21.  If you'd like to link up something this weekend, please link it up with last week's linky party found just below this post!

We've been really busy around here with office work (annual tax recons - booo - and opening a new shop - yay), so I haven't got around to setting up a new linky party or anything, but I'll be back tomorrow to post my latest project! :)


.

Thursday, May 5, 2011

Who Made What? Weekends! #20!

First, here's this week's feature from last week's link up...as voted for by you.......

Trisha from Roundabout's lamp make-over!
Isn't it so unique and lovely? She covered this lamp with book pages cut into circles.  I think it must add a lovely soft light to a room. :)

Thanx to everybody who linked up last week - I hope we'll see you back here this week with some more interesting projects to share. :)  So here goes.....


.

Wednesday, May 4, 2011

And the Winner is........

The winner of my giveaway has been chosen!
Now, somewhere in blogland someone gave me the idea of using an assistant in the winner drawing process - let me know who you are if you see this!  She elicited the help of her cute kitty - my kitty was snoozing so I got another family  member to step up.  Here's what I did...
I put all the names of the entrants onto pieces of paper:
And called my assistant DeeDee nearer:
I layed out the names in a line and placed some foodies on them:
So DeeDee came up and started sniffing from one end all on her own - she started from the first one too, hehe:
And went all the way down the line to the end:
And chose the last one!
 
And the winner is........
Susan, from Pieces of Fate! :)

Please email me at naturallymecreations@gmail.com within 7 days with your address, otherwise I'll be drawing a new winner next week Thursday. 

Prize has been claimed & shipped off

Thanx to everybody else who entered as well! :)


Tuesday, May 3, 2011

Ribbon & Bead Necklace

Here is a necklace that I made that was originally inspired by the sweet & crafty Khadija from Creative Mind's cute spring-inspired necklace - I loved her use of ribbon in the necklace and I couldn't wait to try my own version, so here it is!
I used Khadija's "pattern" for the most part, just with my own little tweaks here and there.  As for the rest, I used beads and a pendant that I had in my beading supply.  Fortunately I had those red round beads that matched the ribbon exactly. :)

Meet my little hippo model:
 
As cute as she is, I probably really need to get myself one of those necklace display "doll" neckline thingies, huh?


LINKY PARTIES linked to:
Sugar Bee Crafts            Vintage Wanna Bee
Today's Creative Blog 
I'm Topsy Turvy             Rook No. 17
The Blackberry Vine      The Shabby Chic Cottage
Somewhat Simple          Tales from Bloggeritaville
It's Sew Stinkin' Cute     Beyond the Picket Fence
Mel Dreams Often        Crystal's Craft Spot
Purple Froggie Clay Stuff

Monday, May 2, 2011

Huge Blog Candy & A Thank You

There is some HUGE blog candy going on at Priscillastyles...which is why I'm letting y'all in on it...but mostly because I wanna win it!  ;)
How generous is that?! :D Stop by their blog to find out how to enter - it's easy peasy, and this is an international giveaway!
There are even more prizes as well, if you can believe it, but you'll have to head on over there to find out for yourself! :)
Ends 31 May.

* * * * * * * * * * * * * * * * * * * *

And then I want to say thank you to Theresa from Crafts/Friends/Angels who sent me a sweet little surprise package as a lucky runner-up-winner to a blog candy giveaway she was having for her b'day! :)  Not only are her posts fun to read (she sounds so full of energy!), but she makes some really lovely cards as well - go have a looksie!

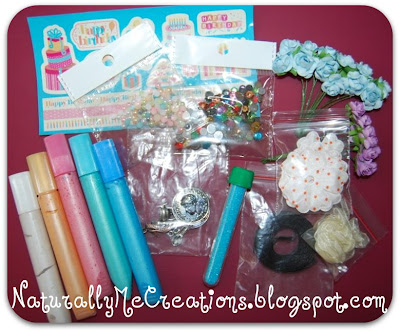
Here's what she sent me:
Lots of fun little goodies!  Isn't she sweet?  :)