Sunday, January 22, 2012

Post-it Holder

While visiting some other blogs today, I got a really cute and fun idea for a post-it notes holder for your desk.  I got the idea from Sarah from Dotted Line Crafts!  Here's my version:
I've had this plastic photo frame in my cupboard for years, but I didn't want to use it for displaying photos 'cause....I think it's a little tacky for my taste, plus it's a little damaged.  But today I got this really cool idea. :D  (another reason why I'm glad I'm a hoarder - I knew I'd find an interesting way to use this sooner or later!)
I took some scrapbook paper and placed it in the holder behind the frame.  I actually wanted to use something damask-y in black & white, but I didn't have anything. :(  And as impatient as I am, I couldn't wait to go out and buy one, so I used the next best alternative that I had...
I only had a scrap piece of this paper left, which is why the bottom part of the frame didn't have any paper behind it:
But not to worry, I came up with a plan.  I wrapped some black ribbon around the bottom:
And decorated it with a ribbon bow i made:
I like black & pink together, hence the pink bow (in real life it's dark pink-ish, not red).

Instead of gluing my post-it note pad directly to the frame, I decided to make a little box to hold the notes in - that way I could reuse it over and over and over and over....
I then inked the box with a blank stamp pad, and glued a pink flower on the front to cover the staples, and hot glued the box to the frame:
Is this cute of what?!  Thanx for the idea Sarah, I love it! :)
Oh yes, and I also added some pink blings at the top:
This was my second attempt at glueing the box to the frame.  The first time round the glue got cold and it didn't stick, so the second time I was in a rush to position it just right, and of course rushing such a job just doesn't work, so I stuck it on a tad skew - which I'm very miffed about. :/  But oh well, who's judging?

Now I just need to tidy my desk so that I can actually SEE my cute little holder!! :)


Linked up at these LINKY PARTIES:
Sugar Bee Crafts          .

Dishwasher Sign - Clean or Dirty

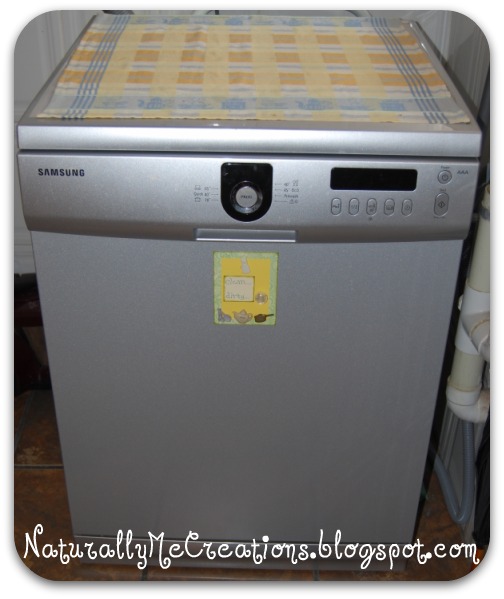
The other half doesn't always do a thourough inspection in the dishwasher before putting more dirty dishes inside, which means that I sometimes have remove said dirty dishes from a load of freshly washed clean dishes.  (no, i don't always remove the clean dishes *immediately*, but that's not the issue at hand right now).

SO, to make both of our lives easier, I finally made a sign for our dishwasher (I've been threatening to make one for a some time now). :)
It's nothing overly fancy, but it's going to do the job just fine.
I used a paint colour sample swatch for the yellow background paper and some patterned scrapbook paper for the green border.  I inked some of the edges too.  I just handwrote the "clean" & "dirty".
 
I glued on some magnetic strips to the back so that it would stick to the washer:
And I used a glass pebble with decoupaged scrapbook paper behind it (which I made long ago and haven't yet found a purpose for, until today) as the movable "marker" - I glued a magnet behind the pebble, so now I can move it next to the appropriate word to indicate the SITREP (situation report, haha) in the dishwasher:
 
Lastly, I added some kitchen / dishes-themed buttons to decorate the sign with.  And ta-da!  :D


Linky up to these LINKY PARTIES:
Scrappy Gifts           The Tattered Tag
I Heart Nap Time    Be Different Act Normal

My sign was featured at Scrappy Gifts! :D

BWS tips button

Wednesday, January 18, 2012

Cute Home Decor

Because our house is not always spotlessly clean and tidy, I've always thought this little saying really cute:

Our house was clean yesterday, too bad you missed it.

So I finally made one for our house. :D
I started out with this board that I bought at the craft store, but didn't yet know what I wanted to do with it...just knew it was something I could do something with:
I painted it with a metallic mink craft paint and inked the edges with a dark gold ink pad.  I chose which papers to use, printed the saying on one of them, chalked the edges and decoupaged them onto the board:
A few months back I decoupaged some scrapbook paper designs to the back of some glass pebble, but ended up not using them, and they've been lying on my desk since then, so I thought it'd actually go well on here:
And then I bought the cutest little mini hats and decided to use one of 'em here - I attached a mini clothing peg to it, inked the one edge of the peg with dark brown ink pad for some colour, and hot glue'd the whole lot onto the board:
 And I added a cute twig heart too:
And my sis gave me some cute buttons for my b'day a while back - I finally found somewhere special to use them! :D  I just had to cut off the button holding thingies at the back (you know those half loops that you sew the buttons on with).  The one on the right is my favourite. :)
Now I just have to find somewhere to hang it up.  It think it turned out SO cute.  (of course I would though, I made it)  :P


Linking up to these LINKY PARTIES:
I Heart Nap Time          The Tattered Tag
Scrappy Gifts                A Vision to Remember
Sugar Bee Crafts           Be Different Act Normal