Showing posts with label picture frames. Show all posts

Saturday, March 17, 2012

Photo Frame Spice-up

I wanted to give my best bud from the UK a photo of her time here when she came to visit me for my wedding in 2010.  I haven't seen her since, until earlier this month when she suddenly decided to come visit again...and I hadn't even started with her frame yet!! So I quickly had to get it done.  Some of her favourite colours were blue, pink, yellow & green and so those are the ones I worked with:
It started out as an ordinary untreated wooden frame:
I painted it white and decoupaged it with torn strips of blue mulberry paper:
I left the corners un-decoupaged to add some interest.
Then I just glued on some flower and voila, done:
I think it's really cute.  I love decorating photo frames. :)

Linked up to these LINKY PARTIES:
Be Different, Act Normal     .

Saturday, May 14, 2011

First Wedding Anniversary Gift - Framed Love Poem

On 30 May is our first wedding anniversary! :D

Well I decided to make something for the occasion.  You know how there's this thing where you're supposed to (for fun of course) give certain specific items for every year of the anniversary?  If you don't, you can see it here: Anniversary Gifts by Year.  For first year anniversaries you're supposed to write a love poem to your partner on scented paper....and since neither of us are into poetry and such, I decided to make something from both of us to both of us. :)  I printed out the words (on scented paper!) to the song which we played when I was walking down the isle at our wedding - Annie's Song by John Denver.  It's not so much a love poem, but I like the song and the words were suitable for this project.  So! Here it is....
I took an old frame laying around here (it started out like this one) and painted it dark brown and spray painted varnish over it.  My mum bought me these pretty scented papers for Xmas, and I only planned to use them for special things (that I don't have to give away, hehe), so I used the first one here.  Can you see the roses?

To decorate it further, I used some swirly chipboard cut-outs which I padded with a purple ink pad to colour it in and spray painted varnish over it too to make it look not so dull - and added some blings on too:
And I used a heart chip board goodie, but I only inked the edges this time - I think it looks nice - and glued on a rose.
I also glued on a mini mirror heart (I used these to decorate some things for the wedding too), and added our initials with stickers:
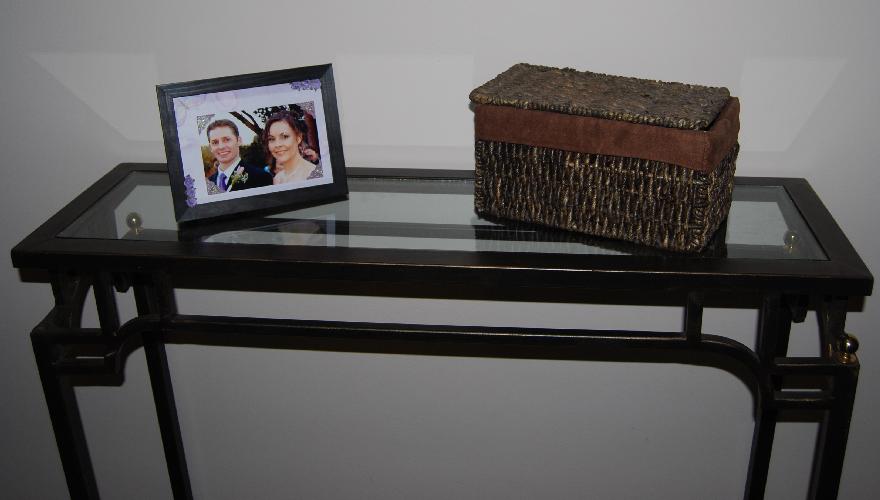
And that's it! I'm really happy with how it turned out. :)  I've put it on the little table in our entrance "hall", next to a wedding photo that I framed HERE too.  :D
 
And then, I had my family over for my b'day last weekend and I made Coconut Snowballs which I topped off with cream cheese icing:
Now get ready for the recipe, because it's quite complicated...

You ready...?

Here's what you'll need to do:

Mix together 1 can of condensedmilk & 750ml desiccated coconut, roll into balls and through some more coconut & chill in fridge.  Whew!

And then I got me one of those huge cupcake mould thingies - and made a huge-@$$ cupcake:
Hehe...anyway, had me some fun with that.  I rolled one of the snowballs in red coconut and used it as a "cherry" to top of the cupcake cake. :)

LINKY PARTIES linked to:
Making the World Cuter    Craft-O-Maniac
The DIY Showoff             All Thingz Related

Monday, April 25, 2011

Kitchen Chocolate Framed Goodie

Remember to enter my GIVEAWAY before 3 May! :)


Every now and again I see these framed printables on other blogs, so I decided to try one for myself, just for fun, but one that was not suited for only 1 occasion (I see many valentines ones, or summer ones or easter themes etc), since I mostly like to make home decor items that are suitable for year round.  So I made one for the kitchen, with a summery chocolate theme.
It's an old photo frame that was laying around here that actually housed a certificate from one of our businesses that we closed down - the frame was broken at one corner but we glued that together again.
The frame started out goldy:
But since gold doesn't have much place in my house, I roughly brushed over the whole frame with ordinary brown acrylic paint, and then I sprayed varnish over it to keep it from being scratched off again.  The photo doesn't show it that clearly, but some gold still shows through the brown, but I preferred that over a solid brown frame:
 I removed the glass (and set it aside for some as yet unknown future crafty project) and used a green checkered flowery scrapbook paper as the background for my artwork. :)
Then I went shopping for different styles of letters and found the 4 you see above.  The "chocolate" were wooden cut-outs which I left as is, because they were sort of coloured already (dark around the edges) and it matched the chocolate theme...and the "cake" were cardboardy letters which I actually dabbed onto a yellow ink pad but it came out green, which suited the background anyway, so all was good.  Oh, and I added some blings to the cake as well:
The "hot" were also wooden cut-outs, and I dabbed them onto a brown ink pad, and the "cocoa" I bought as is:
I glued on some brown pearls and some flowers that I had in my stash.
And hung it on the kitchen wall (there was already a hook there just hanging around doing nothing, that came with the house when we bought it):
Doesn't it just make the kitchen look more home-y?  :D

Anyway, speaking of chocolate...my dad goes to Switzerland every year around Easter time, so he brings us back a big swiss chocolate bunny every year:
Can you believe that my husband actually expects me to share this with him every year?  *SOME* people, ya know...?!  I make him bring out the electronic scale and share this bunny precisely 50/50. :)


LINKY PARTIES linked to:
Rook No. 17              Sugar Bee Crafts
Vintage Wanna Bee    I'm Topsy Turvy
This & That               Free Pretty Things For You
Someday Crafts        Seven Thirty Three
All Things Heart & Home
Scrappy Gifts            Under the Table & Dreaming


SUBMITTED to:
Crystal's Craft Spot Challenge       .

Wednesday, February 2, 2011

Wedding Photo Framed Scrapbook Style (And a Delicious Cake!)

I've framed another one of our wedding photos! I was going to decorate the frame as well, but I thought it would be overkill, so I left it as is...which is nice because I like the dark frame.
I used a lovely purple butterfly and petal themed scrapbook paper for the background, and glued the photo on off-centre as I wanted the butterfly from the paper to be visible as well (since our wedding was butterfly themed after all).
 I hot glued some purple roses onto the glass (I used these roses to decorate at the wedding too), and added some pretty photo corner stickers onto the photo:
I put it on the table in our entrance hall:
And then....to end this post off on a delicious sweet note....
Behold the Tres Leches cake....This photo doesn't do it justice - it looks quite ordinary, but with ingredients like condensed milk, evaporated milk and cream, this cake is anything but ordinary. :D  Mine should probably have looked a tad more moist, but for some inexplicable reason I only added 1 cup cream to the sauce instead of 2 as the recipe requires.... :0

Here's the recipe:

Cake
1 1/2 cups     flour
1 tsp             baking powder
1/2 cup         butter (recipe says unsalted, but it's just fine with salted butter which I used!)
1 cup            white sugar
5                   eggs
1/2 tsp          vanille essence

Sauce
2 cups           whole milk (of course I substituted this for CREAM)
1 can             condensed milk
1 can             evaporated milk

Topping
1 cup             white sugar
1 1/2 cups      heavy cream
1 tsp              vanilla essence

(this cake is yummy as is so I didn't bother with the topping....it really doesn't need it!  It's the sauce that makes this cake)

*   Preheat oven to 175 degrees C.  Grease and flour 1 cake tin.
*   Mix flour & baking powder together & set aside.
*   Cream butter & sugar.  Add eggs and 1/2 tsp vanilla & beat well.
*   Add flour mix 2 tbs at a time & mix well until blended.
*   Pour batter into cake tin and bake for about 30 mins or until ready.  Poke cake many times with fork.
*   Sauce - combine milk (um, CREAM), condensed milk & evaporated milk. Pour over top of cooled cake and let absorb.
*   Topping - whip cream, sugar & vanilla until thick. Spread over top of cake & keep refrigerated.

Note - you'll have place this cake in a container with a high rim (at least 2 inches high to be safe), otherwise the sauce is going to overflow and we don't want to waste all that sauce, do we???

Enjoy! :D


LINKY PARTIES linked to:
Momnivore's Dilemma                 Someday Crafts
Trendy Treehouse                        All Things Heart & Home
Sew Much Ado                           Blue Cricket Design
Nikki's Nifty Knacks                   Night Owl Crafting
Scrappy Gifts                               Fireflies & Jellybeans
Somewhat Simple                       The Shabby Chic Cottage
Beyond The Picket Fence           Tales From Bloggeritaville
Paisley Passions                          It's A Hodgepodge Life
Finding Fabulous                         A Little Lovely Blog
I Heart Nap Time                       Saturday Mornings
Just A Girl                                  C.R.A.F.T.
Sumo's Sweet Stuff                    Mom's Crazy Cooking
Memories by Christine                .

Monday, December 20, 2010

Spicing It Up - Photo Frame Decorating

I thought my dad needed a photo of him and my mum on his office desk, so for Christmas I printed a nice photo of them from our wedding earlier this year, and put it in an ordinary wooden frame:
Of course I couldn't just leave it as is, so I decorated it just a tad:
 
Using a gold metallic leafing pen, I wrote on the frame the date of our wedding (the day the pic was taken), and added some leafy cardboard die-cuts, which, again, I've spray painted gold (it feels like I've been spray painting everything lately!) and glued on with craft glue.
It think it turned out cute. :)

LINKY PARTIES linked to:
C.R.A.F.T.                                        Making The World Cuter
It's A Blog Party                                Keeping It Simple
The DIY Show Off                              Finding Fabulous

Monday, December 13, 2010

Spicing It Up - Photo Frame

I bought a pretty photo frame to give to someone as a gift, but I decided to add just a little something extra to spice it up a bit.

It went from this:

To this:
 
I used a gold ink pad and added some accenting colour to the edges of the swirly decorations on the frame, as well as around the inner most border nearest the photo.  It's not so clear on the photo, but you get the idea!

I had to spray some clear varnish spray paint over the frame afterwards because the ink rubbed off (it's a plastic frame).
And afterwards I decided to hot glue some roses onto the frame (the same ones I used to decorate at my wedding):
 
So after brushing off the cookie crumbs I messed on the photo, it's ready for wrapping! :D

Saturday, November 20, 2010

Decorating Picture Frames - My Wedding & Honeymoon

These are the same frames I used for our wedding to do the guest seating plans in the reception hall.  After the wedding I put white "frames" back into the picture frame and added our wedding and honeymoon photos:

The frames looked too bland with just the photos in them (well...not that the photos are bland, but I'm sure you know what I mean!), so for the wedding frame I took some of the decorations we used for the wedding and added some of them around the photos:


And for the honeymoon frame, I added some leaves that I picked up at one of the places where we stayed during our honeymoon:
 Just a little something extra to spice up a picture frame. :)

LINKY PARTIES linked to:
Funky Junk Interiors
Fireflies And Jellybeans